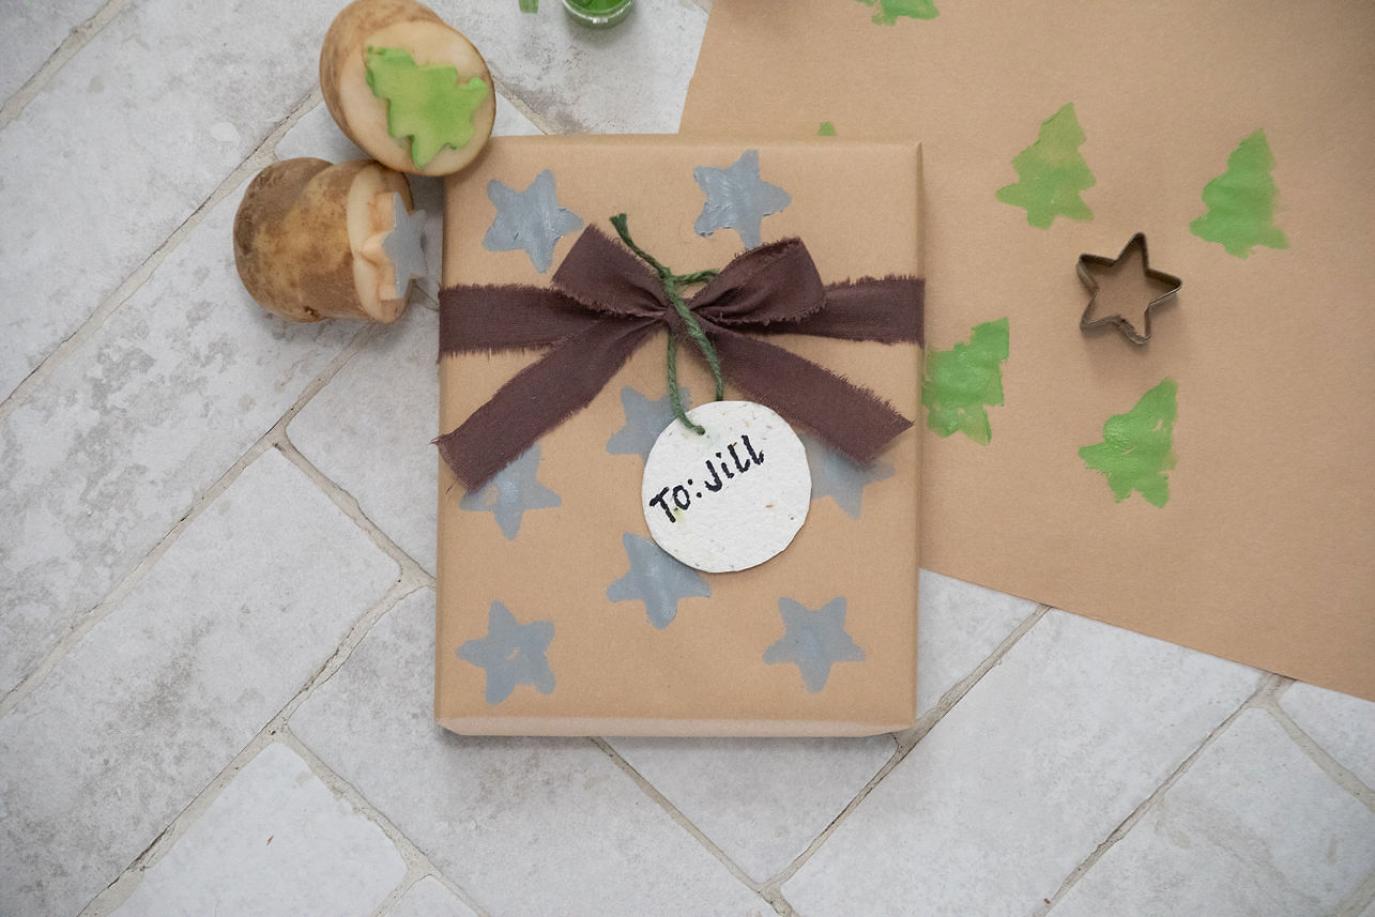
Holiday Crafts: DIY Sustainable Decorations
Seed Paper Gift Tags
This project is perfect for eco-conscious gift-givers who want to add a personal touch. These seed paper gift tags are beautiful and plantable – once the tag has served its purpose, the recipient can plant it in the garden and watch the seeds grow.
This makes approximately 12-14 tags, depending on size.
You’ll need:
Blender
Flat, rectangular strainer with small holes
1 deep dish to hold strainer
2 cups shredded paper (we used
watercolor paper for a sturdy texture)
4 cups warm water
1 packet wildflower seeds
(or any seasonal seeds)
2 kitchen or tea towels
Twine or ribbon
1 small cup
Pencil or pen
Scissors
1. Shred 2 cups of paper and place in a blender.
2. Add 4 cups of warm water and let sit for 1 hour to soften. Blend until the mixture reaches a mushy, oatmeal-like consistency.
3. Add 1 packet of seeds to the blender and pulse a few times to combine, but do not overblend – you want the seeds to remain intact.
4. Set up your deep dish and place the strainer on top. Line the bottom of the strainer with a kitchen towel to help create an even texture. Pour the blended paper mixture onto the towel. Spread the mixture evenly with your hands, or use a rolling pin or glass to smooth it out if desired.
5, Sprinkle the remaining seeds over the top of the spread mixture, then place another towel over it. Press firmly to remove excess water. Once most of the water is absorbed, remove the top towel and let the seed paper dry for 24 hours. If you're working with kids, you can speed up drying with a hair dryer.
6. Once dry, use a small cup to trace circles on the paper, then cut them out. Punch a hole at the top of each circle and thread twine or ribbon through to complete the tag. Tie the tag onto your gift, and don’t forget to let the recipient know they can plant the tag in their garden after use.
Potato Stamp Gift Wrap
This DIY project uses simple russet potatoes to create fun, homemade stamps. Inspired by holiday crafting traditions, this wrap adds a personal touch to gift-giving while incorporating natural materials and creative flair.
You’ll need:
Two large russet potatoes
Paint (color of choice)
Various small metal holiday-themed cookie cutters (trees, stars, etc.)
One roll of brown craft paper
Twine or ribbon for decoration
1. Cut each potato in half horizontally.
2. Press the cookie cutter firmly into the cut side of the potato to create an impression.
3. Use a knife to carefully cut away the surrounding potato, leaving the shape raised to form a stamp.
4. Use a paintbrush to apply a thin layer of paint to the raised part of the stamp, making sure to cover the entire surface evenly.
5. Roll out a sheet of brown craft paper on a flat surface. Press the potato stamp onto the paper, lifting it carefully to reveal the design. Continue stamping to create a pattern. Reapply paint as needed to keep the impressions consistent.
6. Allow the paint to dry completely. Once dry, use the custom-stamped paper to wrap your gifts. Finish with twine or ribbon for a rustic, handmade look.
Dried Citrus Garland
This charming dried citrus garland is a sustainable way to decorate gifts, wreaths or your home for seasonal decor. Using fresh grapefruit, lime and orange slices, the vibrant colors and natural beauty of the citrus create a lovely and fragrant aesthetic.
You’ll need:
Two grapefruit
Two oranges
Three limes
Scissors
Twine or ribbon (for threading)
1. Slice the grapefruit, oranges and limes into 1⁄4-inch rounds. Pat the citrus slices dry with a towel to remove excess moisture and place on a parchment-lined baking sheet in a single layer. Bake for 2-3 hours at 200°, flipping the slices every 30 minutes, until fully dried. They should feel firm and not sticky to the touch. Let the citrus slices cool completely.
2. Use scissors to carefully poke small holes in the center of each slice for threading.


